Let’s be honest: the moment you decide to renovate, a wave of questions hits you. It’s not just about paint swatches and floor samples. It’s about the stuff that keeps you up at night—budgets that balloon, timelines that stretch, and the sheer terror of opening up a wall only to find a problem you never budgeted for. We’ve been in your living room, looking at the same cracked ceiling or awkward kitchen layout. Over years of running a design-build firm here in San Diego, we’ve found the same core concerns come up again and again. This isn’t a theoretical guide; it’s a collection of answers forged from real projects, real mistakes, and real solutions.
Key Takeaways
- The single biggest budget-killer isn’t material choice—it’s scope creep and unforeseen structural issues. A 10-20% contingency is non-negotiable.
- Permits are about safety and resale value, not bureaucracy. In San Diego, skipping them can halt your sale and cost you far more later.
- The “right” order of operations is critical: think demolition, then rough-ins (electrical/plumbing), then insulation/drywall, then finishes. Deviating creates costly rework.
- Your relationship with your contractor is your project’s foundation. Clear communication and a detailed contract are more valuable than the lowest bid.
What’s the one thing that always blows a renovation budget?
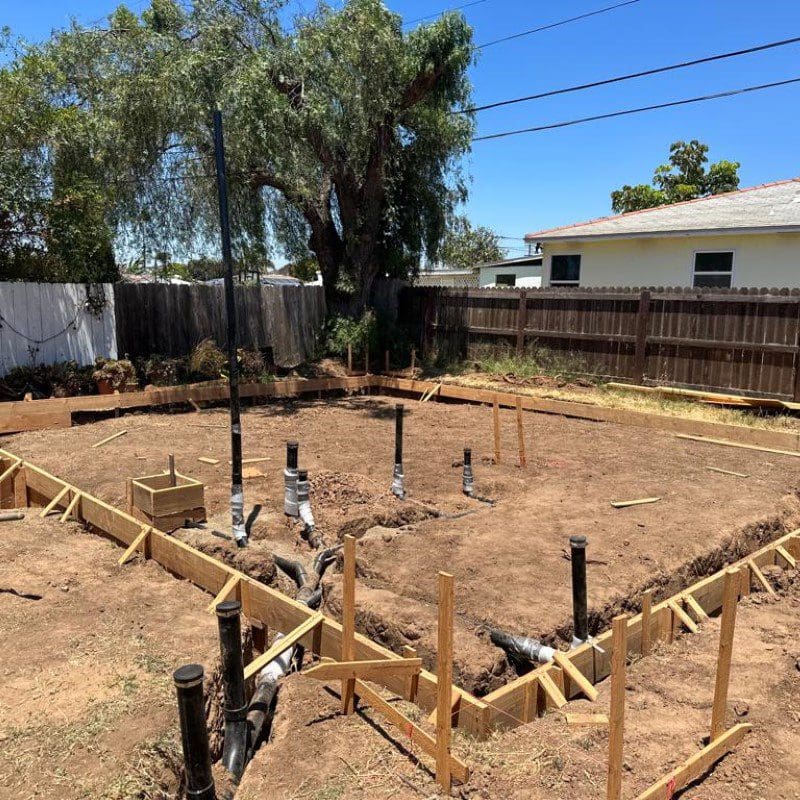
It’s rarely the marble countertops you splurged on. The true budget assassins are invisible at the start. In older San Diego homes, especially in neighborhoods like North Park or South Park with their charming Craftsman bungalows, it’s often knob-and-tube wiring lurking in the attic, or plumbing that’s not just old, but actively corroded. You can’t see these issues until the walls are open. The other silent killer is scope creep. It starts innocently: “Well, while we’re redoing the bathroom, we might as well move this light switch…” Each “while we’re at it” adds 5% to your cost. The fix? A rigorous pre-construction investigation and a disciplined mindset about changes once work begins.
Featured Snippet: Budget Contingency
A renovation budget should always include a contingency fund of 10-20% of the total project cost. This is not for upgrades, but for addressing unforeseen issues like outdated wiring, plumbing, or structural problems discovered once walls are opened. Treating this fund as a mandatory, non-negotiable line item is the most effective way to prevent financial stress during a project.
Do I really need permits for this?
We get the frustration. Permits feel slow, expensive, and bureaucratic. But here’s the perspective shift: they’re not for the city; they’re for you. A permit ensures the work is inspected for safety—that electrical won’t start a fire, that a load-bearing wall wasn’t removed. In San Diego, if you sell your home, unpermitted work can derail the transaction, force you to open up walls for inspection years later, or even reduce your home’s appraised value. As a rule, if you’re moving a wall, changing electrical or plumbing layouts, or altering the structure, you need a permit. Painting, flooring, and cabinet swaps typically don’t. When in doubt, check. The City of San Diego’s Development Services Department website has clear guidelines.
How do I choose a contractor I can actually trust?
This is the million-dollar question (sometimes literally). Ditch the mindset of collecting three bids and picking the middle one. The lowest bid is often the most dangerous—it usually means something critical is missing or they’re desperate for work. Your goal is to find competence and compatibility.
- Dig Beyond Online Reviews: Ask for 2-3 references from projects completed at least two years ago. Talk to those homeowners. Ask, “How has the work held up?” and “What was the biggest conflict during the project, and how was it resolved?”
- Look for Specificity: A vague proposal is a red flag. The contract should specify brands, model numbers, quantities, and procedures. “Install flooring” is vague. “Install 400 sq ft of Bruce Engineered Oak, 7” plank, in Toasted Birch, using recommended underlayment” is specific.
- Trust Your Gut in the Meeting: Do they listen, or just sell? Do they point out potential challenges in your plan, or just yes-you to everything? A good contractor manages expectations, they don’t just agree with them.
What’s the realistic timeline for a kitchen or bathroom remodel?
Everyone wants it done yesterday. But good work has a natural rhythm. For a full kitchen remodel in a home where you’re also living, a 10-14 week timeline is realistic, not slow. For a primary bathroom, 6-8 weeks. The table below breaks down why it takes so long, and where delays most often hide.
| Phase | What Happens | Why It Takes Time & Common Delays |
|---|---|---|
| Planning & Permitting | Design, engineering, city permit submission/approval. | This is the “invisible” work. San Diego permit timelines can vary wildly. Rushing design leads to change orders later. |
| Demolition & Rough-Ins | Tear-out, followed by new framing, electrical, plumbing, HVAC runs. | Unforeseen structural issues appear here. Coordinating separate electricians, plumbers, and framers requires precise scheduling. |
| Inspections & Drywall | City inspects rough work, then insulation, drywall, mud/tape/sand. | Failing an inspection can set you back 1-2 weeks. Drywall mud needs days to dry between coats for a flawless finish. |
| Finishes & Installations | Cabinets, countertops, tile, flooring, paint, final fixtures. | This phase feels fast but is detail-heavy. A single mis-measured countertop can halt everything for weeks. |
| Final Punch List | Fixing minor imperfections, final cleaning, final inspection. | This is the 1-2 week polish that separates good work from great. Don’t let your contractor skip it. |
Should I live in my house during the renovation?
This is a quality-of-life calculation with cost implications. For a single bathroom remodel, you can probably tough it out. For a whole-house or major kitchen renovation, moving out is often cheaper in the long run when you factor in the cost of takeout every night, the stress on your family, and the fact that the crew can work more efficiently without navigating your life. We’ve seen projects finish 20% faster when the homeowners are out. In coastal San Diego, consider our mild climate: if you’re doing an addition in spring, setting up a temporary outdoor kitchen under a patio cover might be a viable, money-saving option.
How do we handle decisions and changes without driving each other crazy?
First, make all major material selections before the hammer swings. Tile, plumbing fixtures, lighting, paint colors—have it all physically in-hand or ordered. Changes after work begins are the primary source of conflict and cost overruns. Second, appoint one point of contact in your household for daily communication with the project lead. A “design-by-committee” approach with conflicting instructions from multiple family members will confuse the crew and slow progress to a crawl.
Featured Snippet: Change Orders
A change order is a formal, written amendment to your construction contract for any alteration in scope, timeline, or cost after work begins. It should detail the change, the associated cost impact, and any effect on the schedule. Never authorize work verbally. Insist on a signed change order for every single deviation from the original plan to avoid disputes and unexpected bills at project completion.
When is it worth hiring a designer versus just using my contractor’s plan?
This depends on the project’s complexity and your own vision. If you’re doing a straightforward like-for-like replacement, a contractor’s experience may suffice. But if you’re reconfiguring a space, knocking down walls, or have a strong aesthetic vision but struggle to articulate it, a designer is worth their fee. They translate your “vibe” into a buildable plan, think through flow and functionality you might miss, and can often specify materials and fixtures that your contractor doesn’t have access to. They act as your advocate and translator throughout the process. For a whole-home remodel in La Jolla or Point Loma, where architectural integrity and resale value are paramount, this partnership is crucial.
What’s something you wish every homeowner knew before starting?
That renovation is a process of discovery, not just execution. The plans are your best-case-scenario map, but the walls will reveal their secrets. Your resilience and your team’s problem-solving ability will be tested. The goal isn’t a perfect, stress-free process—that doesn’t exist. The goal is a well-built home you love, achieved through a partnership based on clear communication, realistic expectations, and mutual respect. The dust will settle. The memories of the disruption will fade. But the quality of the work, and the joy of the space, will remain with you for years.
People Also Ask
The 30% rule for renovations is a common budgeting guideline suggesting you should not spend more than 30% of your home's current market value on a major renovation project. This rule helps maintain financial prudence, ensuring the investment aligns with the property's worth and maximizes the potential for a positive return. For instance, if your home is valued at $500,000, a major remodel budget should ideally stay around $150,000. This cap helps prevent over-improving for the neighborhood, which can make it difficult to recoup costs upon sale. It's a strategic starting point, but final budgets must also consider specific project scope, local market conditions, and personal financial circumstances.
When communicating with your contractor, avoid making statements that can undermine the project's efficiency or your professional relationship. Never say, "I don't have a budget," as this removes crucial financial guardrails. Avoid, "Just do whatever you think is best," without providing clear direction, as it leads to scope creep and misaligned expectations. Do not admit, "I didn't get the necessary permits," as this places the contractor in a legally risky position. Refrain from discussing payment for cash discounts off the books, which is unethical and voids warranty protections. Clear, honest, and prepared communication is key. For a comprehensive guide on preparing for a successful renovation, be sure to review our internal article, The “Before You Demo” Checklist Every Homeowner Needs.
When purchasing a renovated home, several red flags warrant careful inspection. A lack of proper permits for major structural, electrical, or plumbing work is a critical warning sign, as it indicates unregulated and potentially unsafe modifications. Be wary of fresh paint or flooring that seems to be hiding foundational cracks, water stains, or uneven surfaces, which can signal unresolved structural or moisture issues. Poor workmanship, like uneven tile, mismatched fixtures, or sloppy paint lines, often reflects rushed, low-quality renovations. Additionally, an absence of documentation for new appliances, roof, or HVAC systems makes it difficult to verify warranties and installation quality. Always hire a qualified, independent home inspector to uncover any cosmetic cover-ups for deeper problems.
Adding certain high-value improvements can significantly increase a home's value. A well-designed kitchen or bathroom renovation often provides the best return, with premium materials and modern layouts. Adding square footage through a permitted addition, like an extra bedroom or a primary suite, is another reliable method. For many properties, enhancing curb appeal with professional landscaping, a new roof, or updated siding creates strong first impressions. Installing energy-efficient systems, such as new windows, HVAC, or solar panels, also appeals to today's buyers. It's crucial to focus on quality workmanship and choices that align with neighborhood standards to ensure the investment pays off during a future sale.